Learn how to clean out a storage unit with practical, expert advice. Our guide covers sorting, junk removal, and tips to make the process stress-free.
How to Clean Out a Storage Unit A Practical Guide
Staring down a storage unit packed to the gills can feel overwhelming. But I've learned from countless cleanouts that what separates a weekend of chaos from a smooth, methodical process is what you do before you even roll up that metal door. A little bit of planning is your best defense against burnout.
Your Smart Start to a Stress-Free Storage Cleanout
The real work starts at home, not at the facility. Jumping in without a strategy is a recipe for making multiple trips, getting stuck on what to do with everything, and potentially missing your move-out deadline.
First things first: find your rental agreement. This isn't just bureaucratic paperwork; it’s your rulebook. You need to know the notice period your facility requires to end the lease, your official move-out date, and any penalties. Some places demand 30 days written notice, so you can't just empty the unit and walk away.
Define Your Goals and Timeline
Now, get brutally honest about how long this will take. Cleaning out a storage unit that's been a catch-all for years is not a quick afternoon task. As a rule of thumb, a packed 10x10 unit will likely take two people a full day—think 6-8 hours—to sort through properly.
Decide on your end goal. Are you completely emptying the unit to close the account for good? Or are you just trying to downsize to a smaller, cheaper unit? Your answer shapes the entire project.
To build a realistic timeline, ask yourself:
- How big is it? A 5x5 locker might just be a morning project, while a 10x20 unit could easily eat an entire weekend.
- How full is it? Can you walk inside, or is it packed solid from floor to ceiling? The less wiggle room you have, the more time you'll need.
- How decisive can you be? Sorting through boxes of photos and sentimental items will take far longer than dealing with old furniture. Be honest about your emotional attachment to the contents.
Once you have an estimate, block that time out on your calendar like a doctor's appointment. I always recommend adding a buffer day, just in case. Surprises are common, and it’s better to finish early than to be scrambling at the last minute.
As a pro tip, a good cleanout follows the 60/30/10 rule. Plan on spending 60% of your time just sorting and making decisions, 30% on the physical removal and transport, and the final 10% on sweeping up and closing out.
Conduct a Preliminary Inspection
Before the big day, swing by the unit for a quick visual inspection. Don't start pulling things out. Just open the door, let your eyes adjust, and get the lay of the land. This is your chance to turn your abstract plan into a concrete one.
Snap a few photos from the doorway. These will be invaluable later when you’re back home trying to remember what’s in there. More importantly, this is when you spot the "problem items"—that huge sleeper sofa, an ancient mattress, or a non-working freezer. These big, awkward pieces always require a special game plan for removal. This quick walkthrough will tell you exactly what kind of help, supplies, and vehicle you really need to get the job done right.
Essential Supplies for a Safe and Efficient Cleanout
The difference between a smooth cleanout and an absolute nightmare often comes down to one thing: having the right supplies on hand. Just showing up with a few empty boxes is a recipe for frustration. A successful clear-out requires the right tools for sorting, moving, and—most importantly—keeping yourself safe.
I can't stress the safety part enough. Many people forget that a storage unit, especially one that's been sealed for years, can be a pretty grimy environment. I once cracked open a unit that had been untouched for over a decade, and the wall of dust and mildew that hit me was a serious wake-up call. That taught me a lesson: personal protective equipment (PPE) is never optional.
Gear Up for Safety First
Before you touch a single thing, think about your health. Dust, mold spores, and who-knows-what-else are almost always present in long-term storage, and you don’t want to spend the day breathing it all in.
Your basic safety kit should include:
- Durable Gloves: Forget the flimsy latex kind. You need sturdy work gloves to protect your hands from rusty metal, splinters on old furniture, and whatever else might be lurking.
- Dust Masks or Respirators: An N95-rated mask is your best friend here. It’s the minimum you should have to filter out fine dust and potential mold. This is non-negotiable.
- Sturdy, Closed-Toe Shoes: This one seems obvious, but you’d be surprised. Protect your feet from dropped boxes or sharp objects hidden on the floor. Absolutely no sandals.
- Safety Goggles: If the unit looks particularly nasty or you're breaking down items, a pair of simple goggles will save your eyes from a world of irritation.
Investing in a $20 safety kit is one of the smartest moves you can make. It prevents a day of hard work from turning into a week of respiratory issues or a trip to urgent care for a cut or splinter.
Once you’re protected, you can focus on the tools that make the real work of sorting and clearing out so much easier.
Tools for Sorting and Organization
An organized cleanout is an efficient one. The goal is to touch every item just once, immediately deciding its fate and putting it in the right place. To do that, you need your sorting supplies ready from the get-go.
My advice? Bring more than you think you need. It’s far better to have extra bags and boxes than to halt your progress for an annoying supply run.
Here’s what you’ll want in your organizational toolkit:
- Heavy-Duty Trash Bags: Get contractor-grade bags—at least 3 mil thick. Standard kitchen bags will rip the second you put anything pointy or heavy in them.
- Sorting Bins or Tarps: This simple trick makes a huge difference. Lay out different colored tarps or label large bins for your "Keep," "Donate," "Sell," and "Trash" piles. It keeps the chaos contained.
- Boxes and Packing Tape: For the items you’re taking home, have a good supply of sturdy boxes in various sizes.
- Permanent Markers and Labels: Label everything. Be specific on the boxes you're keeping ("Kitchen - Glassware," "Winter Clothes"). A quick "Donate" or "Sell" label works for the rest.
If you need more ideas for handling all the stuff you're getting rid of, take a look at our junk removal tips and resources for some extra guidance.
Equipment for Moving and Cleaning
Finally, let's talk about the gear that will do the heavy lifting and final cleanup. Don't try to be a hero and muscle everything yourself; the right equipment saves your back and cuts your work time in half.
Make sure you have these items for the physical work:
- Dolly or Hand Truck: This is a true back-saver for moving stacks of boxes, small furniture, or heavy items. If you don't own one, most storage facilities will let you rent one for a small fee. Just ask at the front desk.
- Broom, Dustpan, and Mop: Your rental agreement almost certainly requires you to leave the unit "broom-swept clean." A thorough sweep is the bare minimum you need to do to get your security deposit back.
- Basic Toolkit: You never know when you'll need it. A simple kit with a hammer, screwdrivers, and pliers can be a lifesaver for disassembling furniture or removing an old lock.
- Portable Lighting: Most storage units have a single, dim bulb—if that. A bright, battery-powered work light or a simple headlamp makes a world of difference for seeing into those dark corners.
A Proven Method for Sorting Your Belongings
Alright, you've got your gear, and you're standing at the door of the storage unit. This is where most people get overwhelmed. The secret to getting through this without losing your mind is to have a simple, non-negotiable system. Forget random decision-making.
I've found the most effective strategy is what I call the four-category system. Before you even think about touching a single item, you need to set up four distinct zones. Lay out a few tarps just outside your unit door and label them: Keep, Sell, Donate, and Dispose. From this moment on, every single thing you pick up goes immediately into one of these piles. No exceptions. No "I'll decide later" pile.
This isn't just about sorting; it's a workflow. You need your gear, your tools, and your zones ready to go before you start.
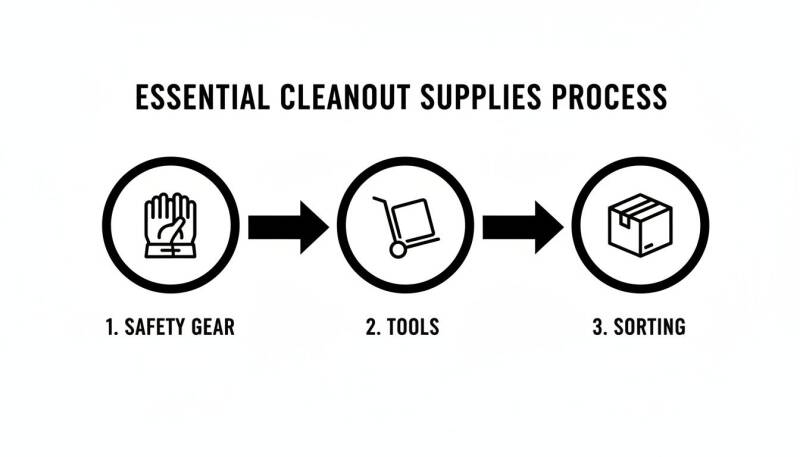
Think of it this way: a successful cleanout is built on a foundation of safety and having the right equipment ready before the real work begins.
Navigating the "Keep" Pile
Let's be honest: this pile should be your smallest. The things you keep are items you have an immediate use and a definite space for in your home. This is not a "maybe someday" category.
As you sort, be ruthless with your questions:
- Do I have a specific place for this? If you can't picture exactly where it will live, it doesn't belong here.
- Have I used this in the last year? If it's been packed away for five years, you’ve already proven you can live without it.
- Is this a duplicate? Most of us don't need three slow cookers.
For sentimental stuff, give yourself one "memory box." This is for a curated handful of photos, letters, and small keepsakes. The goal here is to get rid of your storage unit bill, not just move the clutter from one place to another.
Strategies for the "Sell" Pile
This is for anything with real market value that you no longer need. But be realistic—your time is valuable, and spending a week trying to sell a $20 lamp is rarely a good return on your effort.
Here's a personal rule I stick to: the $50 threshold. If I can't realistically get at least $50 for something, it goes straight into the donate pile. This one rule simplifies countless decisions and saves a massive amount of time.
For furniture, electronics, or collectibles that might be worth more, do a quick search on Facebook Marketplace or eBay right there on your phone. It'll give you a reality check on pricing. Snap good, clear photos of these items on-site so you can create listings later without hauling them home first.
I once worked with a client who spent an entire afternoon agonizing over a collection of old porcelain dolls. A quick online search revealed they were mass-produced and worth next to nothing. That five-minute search saved us hours of indecision and effort.
Making the Most of Your "Donate" Pile
Your unwanted goods can be a huge help to local charities, but please remember: a donation is not a dump. Only put items in this pile that are clean, gently used, and in working order. Things like stained mattresses, broken appliances, or torn clothes just become a disposal problem for the nonprofit.
Look beyond the big national thrift chains. Many local organizations have specific needs:
- Animal Shelters: Always grateful for old towels, blankets, and linens.
- Homeless Shelters: Often need warm clothing, unused toiletries, and sturdy bags.
- Furniture Banks: These charities specifically look for furniture and housewares to help families getting back on their feet.
Before you load up your car, give them a quick call or check their website for donation guidelines. Some charities even offer pickup services for large furniture, which can save you a lot of hassle. And don't forget to get a receipt—you can often claim a tax deduction for your contributions.
Handling the "Dispose" Pile Responsibly
This is for everything else—the broken, the expired, the unusable. It’s often the biggest pile. While it's tempting to just find the nearest dumpster, responsible disposal is key.
You'll quickly find that many common items can't go into the regular trash. You’ll need a separate plan for things like:
- E-Waste: Old TVs, computers, and printers contain hazardous materials. They must be taken to a certified electronics recycling center.
- Hazardous Materials: Old paint, motor oil, and harsh cleaning chemicals require special disposal. Check your county's website for local hazardous waste collection days.
- Mattresses: To keep them out of landfills, many cities and towns have specific mattress recycling programs.
For the rest of the junk, use those heavy-duty contractor bags. If the pile gets overwhelming, renting a small dumpster or hiring a professional junk removal service is often far more efficient than making a dozen trips to the dump. This four-pile system—Keep, Sell, Donate, Dispose—is what turns a chaotic mess into an organized, manageable project.
Getting Everything Out: The Logistics of the Final Haul
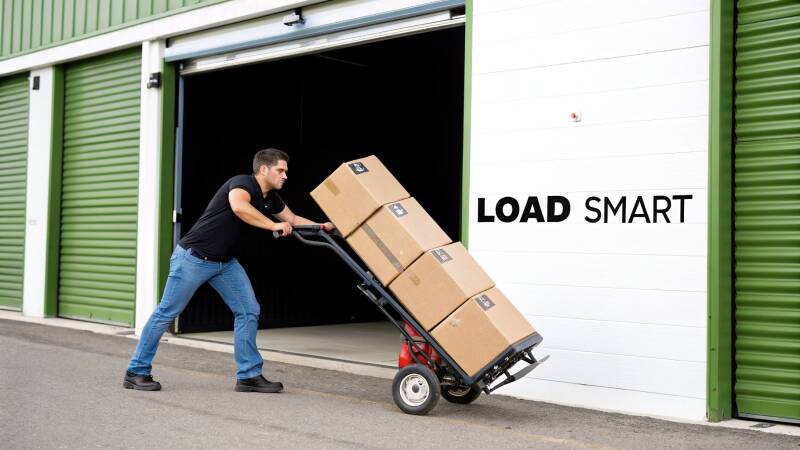
You’ve sorted everything into piles—Keep, Sell, Donate, and Dispose. That was the hard part, mentally speaking. Now for the physical challenge: getting it all out.
A solid exit strategy is what makes the difference between a clean, one-day job and a logistical nightmare that drags on for a week. Let’s get this stuff moved.
For a very small unit, you might get by with a pickup truck and a few trips. But for most cleanouts, renting a moving truck from a company like U-Haul or Penske is the only way to go. A 10-foot to 15-foot truck is usually the perfect size for clearing out a standard 10x10 storage unit.
A quick pro tip: book that truck well in advance. If you're planning this for a weekend, you'll be competing with everyone else who's moving, so don't wait until the last minute.
How to Load a Truck the Right Way
Staring into the back of an empty truck can feel a bit overwhelming. Don’t just start chucking things in. How you load the truck is just as important as how you sorted your piles. A little strategy here prevents broken furniture and frustrating second trips.
Here’s my tried-and-true method for loading a moving truck efficiently:
- Heavyweights First: Start with your heaviest, most solid items. We’re talking about appliances, dressers, and filing cabinets. They go in first, packed tightly against the wall closest to the cab. This helps distribute weight evenly and makes the truck much safer to drive.
- Long and Awkward Items: Next, slide in things like mattresses, box springs, headboards, and large mirrors. Stand them upright along the long walls of the truck. I always use moving blankets to protect their surfaces and secure them with straps to keep them from sliding around.
- Build the Base: Use your heaviest boxes to create a solid base layer across the floor of the truck. Once you have a sturdy foundation, you can start stacking lighter boxes on top. Never put heavy boxes on top of lighter ones—it’s a recipe for crushed belongings.
- Fragile Last: Your most delicate possessions should be the very last things on the truck. Place them in a secure spot where they won’t get crushed or shift during transit.
The Game-Changer: Loading by Destination
This is the single best tip I can give you for an efficient unload. As you load the truck, create "zones" for each destination.
Put all the "Donate" items together in one section. Pack the "Keep" items meant for your house in another. This simple trick turns one massive, chaotic unloading job into a series of quick, targeted stops. You can drive right to the donation center and clear out that zone without having to dig through everything else.
Loading isn't just about fitting everything in; it's about unloading efficiently. Creating zones for your destinations (home, donation center, recycling facility) transforms one big messy unload into several quick, organized stops.
Coordinating Pickups and Drop-Offs
Before you even start loading, you need a plan for your "Donate" and "Dispose" piles. Don't wait until the truck is full to figure out where everything is going.
For your donations, check with charities like Goodwill, Salvation Army, or Habitat for Humanity ReStore. Many offer free pickup services for large furniture, but you’ll likely need to schedule it a week or more in advance. If you're dropping items off yourself, confirm their hours and locations first.
For everything else, you'll need a disposal plan. A quick search on your local municipality's website will give you the details you need. Look for:
- Bulk Trash Pickup: See if your town has scheduled days for picking up large items like sofas and mattresses from the curb.
- Recycling Centers: Find the proper facilities for items that can’t go to the landfill. This is critical for e-waste (old electronics) and appliances.
- Hazardous Waste: Things like leftover paint, old yard chemicals, or batteries require special handling. Your county’s website should have info on hazardous waste collection events or drop-off sites. For example, old gas-powered tools need specific care, and you can learn more about how to dispose of old lawn equipment in our separate guide.
A few phone calls or a quick online search will save you from having a driveway full of junk with nowhere to go. With a smart removal plan, you’ll be ready for the final sweep-out in no time.
When to Hire a Professional Junk Removal Service
While the DIY approach to cleaning out a storage unit can save you some money, it’s not always the best plan. I’ve seen it countless times: a well-intentioned project turns into a week-long headache filled with stress and strained backs.
Knowing when to call in the pros is just as important as knowing how to sort your boxes. The right help can turn an overwhelming job into a single-day task, and honestly, it's often worth every penny.
Gauging the Size of the Job
First, do a realistic gut-check. Open that storage unit door and be honest with yourself. Are you looking at a small 5x5 unit with a few things, or a 10x20 space crammed from floor to ceiling with heavy furniture, old appliances, and mystery boxes?
If your immediate thought is, “I don’t even know where to start,” that’s a pretty clear sign you could use a hand. A professional crew doesn't just bring muscle; they bring a system. They know exactly how to dismantle a packed unit efficiently without getting stuck.
Consider hiring a pro if you're facing:
- A completely packed unit. If you can’t walk inside or move around safely, experts know how to strategically tackle the chaos.
- Heavy or awkward items. That old sleeper sofa, solid wood armoire, or dead deep freezer isn't moving itself. A crew has the dollies, straps, and experience to get it out without injury or property damage.
- A tight deadline. If you have to be out by the end of the weekend, a professional service is the fastest way to guarantee you meet your move-out date.
When Life Gets in the Way
Sometimes, the decision has less to do with the stuff and more to do with your personal circumstances. The project gets a lot tougher when you're dealing with other logistical or emotional hurdles.
One of the biggest reasons to hire help is distance. Trying to manage an estate cleanout for a relative when you live three states away is a logistical nightmare. It means booking flights, taking time off work, and adding a ton of stress to an already difficult situation. A professional team can be your boots on the ground, handling everything.
Tackling a storage unit cleanout can be physically and emotionally draining. If you're dealing with an estate, a tight deadline, or just feel overwhelmed, hiring a professional service isn't giving up—it's making a smart, strategic decision to save your time, energy, and sanity.
It's More Than Just Hauling
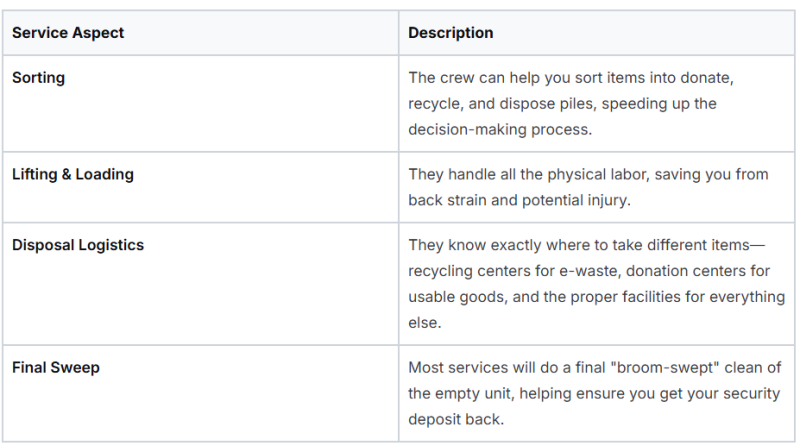
A good junk removal company doesn’t just show up and throw things in a truck. They provide a full-service solution designed to make your life easier.
What to Expect from a Junk Removal Service
Understanding Pricing and What to Ask
Typically, junk removal pricing is based on volume—basically, how much room your stuff takes up in their truck. Reputable companies will offer a free, no-obligation quote right on-site. They'll take a look at everything and give you one upfront price that includes all the labor, transportation, and disposal fees.
Before you agree to anything, make sure you get answers to these questions:
- Are you licensed and insured? (This is a must-have.)
- How do you charge? (Is it by the truckload, the hour, or the item?)
- Can you give me a free, on-site estimate?
- What items do you not take? (Most won't take hazardous materials.)
- Do you make an effort to recycle and donate?
Knowing when to bring in experts is a key part of figuring out how to clean out a storage unit. If you think this might be the right path for you, take a look at the details of professional junk removal services to see how they can simplify the process. Investing in expert help can save you days of work and a whole lot of stress.
Answering Your Top Storage Unit Cleanout Questions
Once you’ve got a plan sketched out, a few nagging questions always seem to surface. That's completely normal. Based on years of experience, here are the real-world answers to the questions we hear most often.
How Long Does This Actually Take?
This is the big one, and the honest answer is: it depends. As a baseline, you should block off a full day. For a typical 10x10 storage unit that's moderately full, two people should expect to spend 6 to 8 hours on the job. That accounts for sorting everything, loading it up, and doing a final sweep.
But that’s just an estimate. The timeline can shift based on a few things:
- How packed is it? A few pieces of furniture and neatly stacked boxes are one thing. A unit crammed floor-to-ceiling with loose, unsorted stuff is a whole different beast.
- What's inside? Big, bulky items are often faster to move out than boxes full of small, sentimental objects that you’ll need to stop and think about.
- How decisive are you? The single biggest time-waster I see is indecision. Hesitating over every single item will grind your progress to a halt.
For comparison, a professional crew can usually knock out that same 10x10 unit in just 2 to 3 hours. They've got the systems and muscle to move fast without getting bogged down in the details.
What's the Biggest Mistake I Could Make?
Hands down, the most common mistake is simply showing up without a concrete plan. People open that roll-up door, get hit with the visual of everything they own, and instantly feel defeated. It's a recipe for a long, frustrating day.
This lack of planning creates a messy domino effect: you run out of boxes, you have no idea where the local dump is, or you realize you can't lift that sleeper sofa into your car.
The biggest pitfall is simply a lack of preparation. A successful storage unit cleanout is 80% planning and 20% physical labor. Walking in with a clear strategy is the best way to avoid burnout and get the job done efficiently.
Can I Just Leave a Few Things Behind?
I can't stress this enough: do not do this. Your rental contract is very clear. You’re required to leave the unit completely empty and "broom-swept clean."
If you abandon items, the facility has to pay a crew to haul them away, and you can be sure they’ll pass that bill right along to you. You'll lose your security deposit, for starters. Then you'll get hit with extra fees for labor and disposal, which are often shockingly high. It’s a surefire way to turn a simple task into an expensive headache.
What if I Find Something Valuable?
It’s the dream scenario, right? You unearth a box and find something you’d forgotten all about—an antique, a collection, maybe some old jewelry. When this happens, take a breath before you do anything else.
- Secure the item. First, move it to a safe place, like your car, where it won't get damaged or accidentally thrown away.
- Do some quick homework. Pull out your phone and do a search on eBay's sold listings or other auction sites. This will give you a rough idea of what similar items are actually selling for.
- Call in a pro. If your quick search suggests it's something special, don't guess. Find a local appraiser who specializes in that category—whether it's furniture, art, or coins—to get a true valuation.
Don't let a lucky find derail your cleanout, but don't just toss it in the "keep" pile without a second thought, either. A little on-the-spot research can help you decide if you've found a genuine treasure.
When the job is too big, too far, or just too much to handle, D&B Complete Home Services INC. is ready to step in. We offer fast, professional junk removal to clear your storage unit quickly and correctly, so you don't have to lift a finger. Visit our website at https://www.dbcompletehomeservices.com to get a free estimate and get your weekend back.
Add comment
Comments