Thinking about removing a whirlpool tub? Our quick guide covers safe demolition, debris disposal, and real cost insights to plan confidently.
Removing a whirlpool tub: the guide to removing a whirlpool tub safely
Let's be honest, that oversized whirlpool tub might have seemed like the pinnacle of luxury when it was installed, but now? For many homeowners, it's just a dust collector that takes up a massive amount of bathroom real estate. If the thought of removing a whirlpool tub has crossed your mind, you're not alone. It's a smart project that can completely modernize your home and reclaim valuable space.
Why Removing Your Jetted Tub Is a Smart Move
That spacious, jetted tub often loses its appeal over time, leaving you with a bulky fixture that’s a pain to clean, stylistically stuck in the past, and rarely gets used. Modern bathroom design has shifted, now favoring layouts that are far more practical and space-efficient.
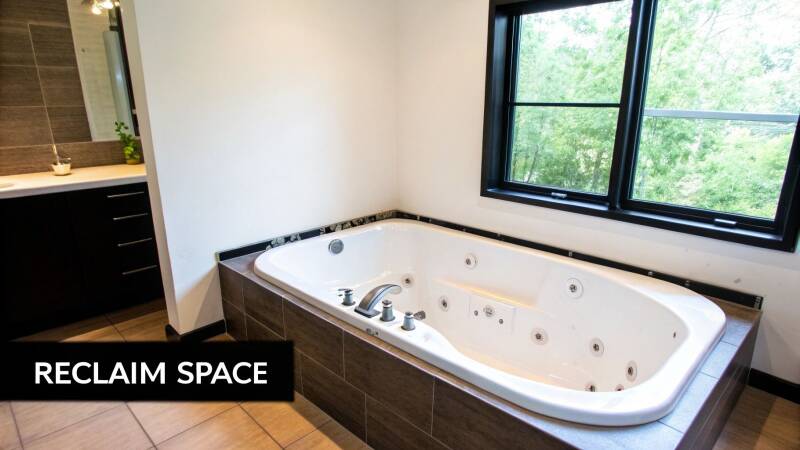
It’s not just about looks, either. Older whirlpool tubs can come with a whole host of maintenance and safety issues. As they age, they can become genuine liabilities that are best dealt with by pulling them out entirely.
Hidden Maintenance and Safety Headaches
Some of the biggest problems with old jetted tubs are the ones you can't even see. That intricate network of pipes and jets is the perfect environment for mold and bacteria to thrive, which makes for a cleaning nightmare and a potential health hazard.
On top of that, the mechanical parts don't last forever. The motor can fail, and the hidden plumbing connections can develop slow leaks. Before you know it, you could be dealing with serious water damage to your subfloor and the ceiling below.
The biggest motivator for many, though, is safety. Outdated whirlpool tubs, especially those with powerful and uncovered suction outlets, are a serious danger. This is particularly true for families with young children. The work involved in removing the tub is a small price to pay to avoid a tragic accident.
Reclaiming Space for Modern Living
One of the best parts of this project is the sheer amount of floor space you get back. Suddenly, your bathroom has a world of new possibilities. You can see just how dramatically removing old fixtures can change a room in our before-and-after remodeling gallery.
Think about what you could do with all that new space:
- A Spacious Walk-in Shower: This is by far the most popular option. A large, accessible shower not only improves daily life but also adds significant value to your home.
- A Double Vanity: No more fighting for sink space in the morning. Adding a second sink and more counter space can be a game-changer.
- More Storage: Finally solve your bathroom clutter issues with a proper linen closet or some custom built-in shelving.
In the end, safety concerns often seal the deal. Data has shown dozens of incidents involving circulation and suction entrapment in pools and whirlpool tubs. Tragically, in tub-related cases, children are the victims 38% of the time, often due to missing outlet covers. To better understand the risks of outdated tubs, it's worth reviewing some insights on bathtub removal safety and costs to see why removal is such a wise investment.
Getting Ready for a Safe and Clean Demolition
Before you even think about swinging a sledgehammer, you need to set the stage. A little bit of smart prep work is what separates a smooth, controlled project from a weekend of chaos and unexpected repair bills. Think of this as your pre-game plan for getting the bathroom ready for the main event.
First things first, get everything out of the bathroom. I mean everything. Toiletries, towels, decor, the contents of your vanity drawers—all of it. Demolition kicks up an unbelievable amount of dust and debris, and you don't want to spend your evening trying to scrub tile grout out of your toothbrush holder.
Protecting What Stays
Once the room is clear, your focus shifts to protecting the things you aren't tearing out. Your floor, vanity, countertops, and toilet are all in the line of fire. I've seen too many DIY projects end with a costly bill for a new floor tile or a deep scratch in a countertop.
- Flooring: Don't skimp here. Put down heavy-duty plastic sheeting and tape it down tight along the edges. If you have tile or hardwood floors, I strongly recommend laying down some ram board or even thin plywood on top of the plastic for an extra layer of defense.
- Fixtures: Drape old blankets or thick painter's drop cloths over the vanity, sink, and toilet. This will protect them from any stray debris or an accidental tool drop.
Yeah, it feels like a tedious step, but trust me, it’s a whole lot cheaper and faster than replacing a cracked toilet or a gouged vanity. A few minutes of prep can save you hundreds of dollars.
Shutting Down the Power and Water—No Shortcuts
This is easily the most critical part of the entire prep phase, and there is zero room for error. A whirlpool tub is tied into both your electrical and plumbing systems. Getting this wrong can lead to a flooded bathroom, serious electrical shock, or worse.
Start with the electricity. Head to your home's breaker box and locate the circuit that feeds the tub’s motor. Flip it to the OFF position. Now, don't just trust that the label is correct. Grab a non-contact voltage tester and physically check for power at the tub's motor and control panel to be 100% sure the circuit is dead.
My Two Cents: Don't just flip the breaker. Put a piece of duct tape over it with a note that says something like, "BATHROOM DEMO - DO NOT TOUCH." It’s a simple trick, but it can stop someone from unknowingly flipping the power back on while your hands are on the wiring.
With the power off, it’s time to tackle the plumbing. The best-case scenario is an access panel near the tub with dedicated shutoff valves for the hot and cold water lines. If you have one, turn the handles clockwise until they're fully closed. If you can't find an access panel, you'll have to shut off the main water supply to your entire house.
Once the valves are closed, open the tub's faucets. This drains the last bit of water out of the supply lines and releases any built-up pressure, preventing you from getting a face full of water when you put a wrench on the fittings. It's also a great idea to snap a few photos of the plumbing layout before you disconnect anything—it can be a huge help later on.
It’s Go Time: How to Actually Remove Your Whirlpool Tub
Alright, you've done the prep work, and now it's time for the main event. Getting a bulky whirlpool tub out of your bathroom isn't about raw strength; it’s a game of strategy. We're going to tackle this step-by-step, starting with the guts of the tub—the plumbing and electrical—before we even think about demolition.
This flowchart lays out the critical prep work. If you haven't done these four things, stop now and go back.
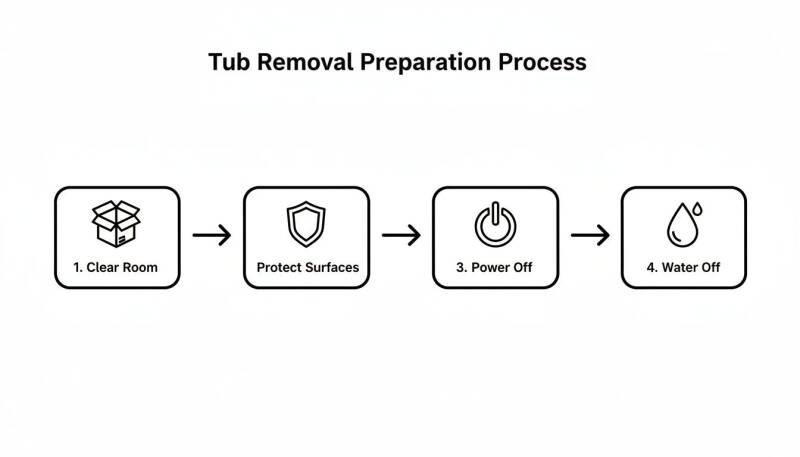
Getting this sequence right—clearing the space, protecting your floors, and killing the power and water—is what separates a smooth project from a weekend disaster.
Getting to the Guts: Plumbing and Electrical Disconnect
First things first, you need to get to the motor and pipes. Hopefully, your tub has a handy access panel. If you’re not so lucky, you’ll have to make your own. Grab a utility knife and a level, and carefully cut an opening in the drywall next to the tub’s motor housing. A clean cut here will make patching it up later a whole lot easier.
Once you have a clear view, find the motor. Pull out your voltage tester one last time and confirm 100% that the circuit is dead before you touch a single wire. It’s a good idea to snap a quick photo of the wiring with your phone for reference, then go ahead and disconnect everything.
Now for the plumbing. You’ll be dealing with the hot and cold water lines and the main drain. Keep a bucket and a few old towels right under your work area, because there’s always leftover water in the lines. Using channel-lock pliers or a pipe wrench, carefully work the fittings loose. Old plumbing can be incredibly stubborn, so use slow, steady pressure to avoid breaking or stripping anything.
Dealing with the Tub Surround
With the tub itself disconnected, your next challenge is the wall surround, whether it's tile or a single fiberglass unit. The goal here is to get it off the wall without causing a ton of unnecessary damage.
- For Tiled Walls: This is where patience pays off. Use a grout removal tool to cut out all the grout surrounding the tiles. Then, armed with a hammer and a flat pry bar or a stiff putty knife, you can start gently popping them off. Definitely wear your safety glasses—flying tile shards are no joke.
- For Fiberglass/Acrylic Panels: These are almost always glued directly to the drywall. Look for a seam or an edge where you can get a pry bar started. As you pull the panel away from the wall, expect it to take the top layer of drywall paper with it. Don’t panic; this is normal and can be fixed with some joint compound during the repair phase.
The Fun Part: Cutting the Tub to Pieces
Let’s be realistic: you’re not carrying a 300-pound whirlpool tub out of your house in one piece. The only practical way to remove it is by cutting it up. Your best friend for this job is a reciprocating saw (often called a Sawzall) fitted with a long demolition blade.
Before you fire up the saw, use a marker to draw your cut lines. You’re aiming to break the tub down into two or three manageable chunks. Pay close attention to what's below and behind your cuts. The last thing you want is to slice through a floor joist or a hidden water line.
Start your cut on the top edge of the tub and work down. This will kick up an incredible amount of fine, itchy fiberglass dust, so a good dust mask and safety glasses are absolutely mandatory. The material can be surprisingly thick, so let the saw do the work. Don't try to force it.
Once you’ve made your cuts, the pieces are almost ready to come out. The tub was likely fastened to the wall studs with screws or clips along a mounting flange. You might need to use your reciprocating saw to cut through these last attachments before you can pry the sections out of the alcove for good.
Handling the Debris and Disposal
So, the tub is out and cut into pieces. You’ve wrestled it from its spot, and that’s a huge win. But now you’re staring at the aftermath: a mountain of fiberglass shards, old pipes, shattered tile, and dusty drywall chunks. The heavy lifting isn't quite over—now it’s time to tackle the cleanup.
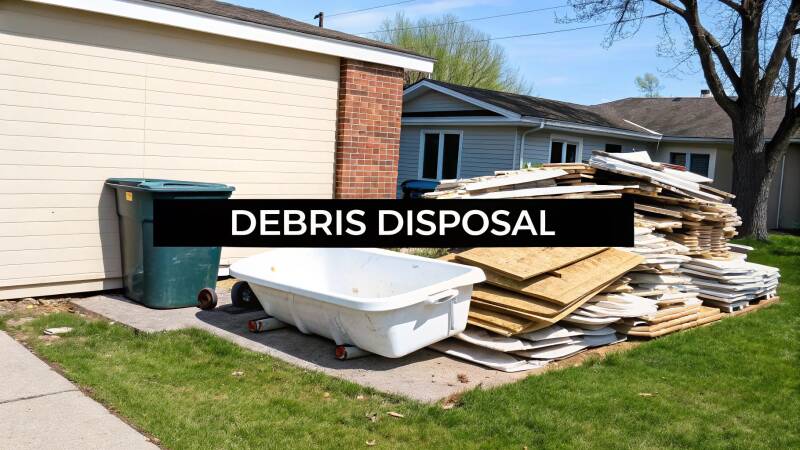
Let's be clear: your regular weekly curbside pickup won’t touch this. The volume, weight, and type of material from a tub demolition require a real disposal strategy. You've got a few solid options for getting your space back.
Your Main Disposal Options
How you choose to get rid of the mess really boils down to your budget, timeline, and how much more work you’re willing to put in. Each path has its own pros and cons.
- Renting a Small Dumpster: If this tub removal is part of a bigger bathroom remodel, renting a 10-yard dumpster or a smaller "bag" style dumpster can be perfect. You just toss everything in as you go, and when you're done, the company whisks it all away.
- Trips to the Local Landfill: Have a pickup truck and a strong back? For a smaller job, you could haul the debris to the local dump yourself. Just make sure to call ahead—many facilities have specific rules and fees for construction waste and often charge by weight.
- Hiring a Junk Removal Service: Honestly, this is the path most people take, and for good reason. It’s the easiest and most efficient route. A crew shows up, does all the heavy lifting, and hauls everything away, ensuring it's disposed of or recycled properly.
It's easy to underestimate just how much debris you'll be dealing with. In the United States, there are around 6 million whirlpool and hot tubs out there. An empty jetted tub can weigh 600 pounds on average, and the big ones can top 1,000 pounds. That translates into a lot of heavy, awkward junk once it's cut up.
For most homeowners, calling in a professional junk removal service is the smart move. It saves you from the back-breaking work of loading sharp, heavy materials and frees you from trying to figure out local disposal laws. They know what can be recycled and what needs to go to the landfill.
Why Professional Junk Removal Makes Sense
After all the dusty, loud work of demolition, the last thing you want is to spend your weekend hauling debris. A company that specializes in professional junk removal services is built for this.
They’ll save you time, a sore back, and the hassle of navigating the dump. Think of it as the final, crucial step that clears the slate, getting you ready for whatever beautiful new fixture is coming next.
What Does It Really Cost to Ditch That Old Tub?
So, let's talk about the bottom line. Budgeting for a whirlpool tub removal can feel a bit like guessing, because the truth is, the price tag can swing quite a bit. Knowing what goes into the cost will help you figure out whether to call in the pros or grab a sledgehammer yourself.
Hiring a professional is often a surprisingly good value. Generally, you’re looking at a range of $150 to $800 for a standard tub removal. If you have a more complex, in-ground beast, that figure can climb to between $400 and $1,100. The great thing is, that price usually wraps up all the labor, hauling, and responsible disposal into one neat package.
Of course, the only way to get a firm number for your specific bathroom is to get in touch with a local expert for a custom quote.
What Makes the Price Go Up or Down?
No two tub removal jobs are ever the same, and the final price will reflect the unique challenges of your space. A pro is going to look at a few key things when they write up your estimate.
Here’s what they’re factoring in:
- What’s the Tub Made Of? A lightweight acrylic or fiberglass tub is relatively easy to slice up and carry out. A cast iron monster, on the other hand, is a whole different story—it’s incredibly heavy and demands a lot more muscle and specific tools to break down and remove.
- How Hard Is It to Get To? Is your bathroom tucked away on the third floor with a winding staircase? Are there tight corners and narrow doorways to maneuver through? Any kind of tricky access adds time and labor to the job, and that will show up in the final cost.
- The Complexity of the Job: Things like the condition of the surrounding tile, the specific type of plumbing you have, and whether the tub is set in a thick mortar bed all add layers of work.
Going the DIY route might look like the cheap option on the surface, but the hidden costs can sneak up on you. You're not just giving up your weekend; you're also on the hook for tool rentals, safety gear, and disposal fees, which can easily hit $50-$100 (or more) at the local dump.
Looking at the Real Cost of a DIY Job
Before you decide to tackle this yourself, it's crucial to think about what "free" really means. The biggest risk you run is accidental damage. One slip with a reciprocating saw can gouge a deep cut into your subfloor. Dropping a heavy chunk of the tub can easily crack floor tiles, chip a vanity, or even punch a hole in the drywall.
Suddenly, your "free" project has turned into a pricey repair job. This is exactly why professional crews carry insurance—it gives you peace of mind knowing you won't be stuck with an unexpected bill for a broken pipe or a damaged wall.
When you add up the time commitment, the sheer physical effort, the very real potential for expensive mistakes, and the headache of figuring out disposal, the value of calling in a pro becomes crystal clear. Most of the time, their speed, safety, and efficiency deliver a much better return on your investment. For a deeper dive into the numbers, you can check out some additional insights on Jacuzzi removal pricing and see how it all stacks up.
Answering Your Whirlpool Tub Removal Questions
Alright, let's talk through some of the questions I hear all the time from homeowners getting ready to tackle this project. These are the practical, "what-if" scenarios that can pop up, and having a good handle on them beforehand will make the whole process a lot smoother.
How Long Does This Really Take?
This is probably the number one question, especially for weekend warriors. For a pro who’s done this a hundred times, removing a whirlpool tub is usually a 2 to 4-hour job, tops. We have the right gear and we know what to expect.
Now, if you're doing this yourself for the first time, give yourself a lot more breathing room. I'd block out a full day, maybe even the entire weekend. You just never know what you'll find. A rusted-on drain, plumbing that refuses to budge, or an unexpectedly thick tub shell can turn a quick job into a long haul. It's always better to have too much time than not enough.
Am I Going to Wreck My Bathroom in the Process?
It's not inevitable, but let’s be honest—the risk is definitely there, especially if it's your first go-around. When you're learning as you go, a simple mistake can lead to a bigger repair job than you bargained for.
Here are a few common mishaps I’ve seen over the years:
- Scraping or gouging the floor while dragging out sharp, heavy chunks of the tub.
- Getting a little too enthusiastic with the reciprocating saw and cutting right through the drywall (or even worse, a pipe you didn't know was there).
- Dropping a heavy piece and cracking the subfloor or, heaven forbid, the toilet next to it.
Professionals have a system to avoid this stuff. We use heavy-duty floor protection, precise tools, and frankly, the experience to know what's likely hiding behind that wall. The goal is to leave you with a space that’s clean, safe, and ready for whatever you have planned next.
What Can I Do With the Space Afterward?
This is where the fun begins! Once that massive old tub is gone, your bathroom suddenly feels huge, and you've got some great options.
By far, the most popular choice is to build a beautiful, spacious walk-in shower. It’s a modern upgrade that makes the bathroom feel more open, improves accessibility, and can be a real plus for your home's resale value.
But that's not your only option. You could also:
- Put in a stylish, standard-sized soaking tub that's way easier to clean.
- Frame in a much-needed linen closet for some serious storage.
- If you have the width, you might even be able to fit a double vanity.
When you’re ready to get that bathroom space back without the headache and the mess, D&B Complete Home Services INC. can take it from here. Our team handles the entire process, from safe demo and haul-away to full-scale bathroom remodels. We’ll leave you with a perfectly clean slate for your new vision. Find out more and get your project rolling at https://www.dbcompletehomeservices.com.
Add comment
Comments