Unlock your home's potential with these basement renovation ideas on a budget. Get pro tips on flooring, lighting, and moisture control for 2026.
8 Basement Renovation Ideas on a Budget
You walk downstairs planning a simple basement refresh. Within ten minutes, the budget starts slipping. Old shelving is anchored into damp walls, scrap wood is piled in the corners, a previous owner left wiring half-covered above the ceiling line, and the paneling that looked serviceable upstairs is swollen at the base.
That is how basement projects get expensive.
The first budget decision is usually not paint, flooring, or lighting. It is whether the space gets cleared, opened up, and exposed enough to show its real condition. Renovate over clutter, damaged finishes, or hidden moisture, and the job gets harder, slower, and more expensive once the problems surface.
A smart basement renovation starts with removal. Get rid of junk. Strip out what has failed. Open the walls or ceiling only as far as needed to inspect framing, plumbing, electrical runs, and signs of water movement. I have seen homeowners save money by doing some of that labor themselves. I have also seen them create bigger repair bills by tearing into load-bearing walls, cutting around live wiring, or leaving demolition waste stacked in the work area for weeks.
Clean access changes every decision that follows. It tells you whether a concrete floor is a good candidate for epoxy, whether the ceiling has room for recessed lighting, and whether the layout can be opened without triggering costly structural work. It also helps you separate cosmetic wants from problems that need attention first.
The good news is that a basement does not need high-end finishes to become useful space. A well-planned budget renovation can turn it into a gym, office, family room, workshop, guest area, or storage space that finally works. The difference is usually made in the rough phase, not the finish phase.
That is why strategic demolition and junk removal are not side tasks. They are part of the renovation plan itself. Handled well, they protect the budget and make every dollar spent later go further. For heavier teardown, hauling, and site prep, bringing in professionals like D&B Complete Home Services INC. often costs less than fixing a bad start.
- DIY Painting and Wall Finishes
A basement can look cleaner in a weekend with paint, but paint only saves money if the walls are ready for it. I have seen homeowners buy good paint, cut in carefully, and still end up with peeling walls because the underlying problem was moisture, dust, or failing old coatings.
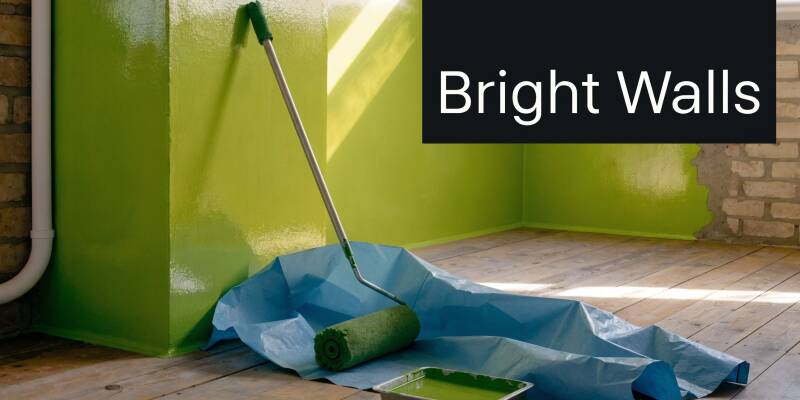
Painting is one of the few finish jobs that often makes sense as DIY. The savings are real when the basement has already been cleared out, stripped back where needed, and cleaned well enough for you to see what you are working with. That first-step cleanup matters here. If junk is still stacked against the walls, you are choosing colors before you have confirmed whether the surface is dry, sound, and worth finishing.
Prep matters more than color
In basements, surface condition decides the result. A simple light gray or warm off-white on a clean, dry wall will outperform a more expensive paint job laid over mildew stains, chalky block, or patchwork repairs that were never primed.
Start with an honest check of the wall material. Drywall, painted masonry, bare concrete, and wood paneling all take paint differently. Concrete and block walls deserve extra caution because they often hold hidden moisture or old coatings that look stable until the new paint goes on. Test a small area first. If it bubbles, flakes, or powders off onto your hand, stop and fix the substrate before you spend time on the whole room.
This is also the point where DIY has limits. If you find active seepage, efflorescence, mold growth, or cracks that suggest movement, call in the right pro before you open a paint can.
What usually works on a budget
A budget-friendly paint job still needs a system. Keep it simple and do the steps in the right order:
- Clean before anything else: Vacuum dust off walls, wipe away grime, and remove loose material.
- Patch and sand the obvious defects: Small holes and rough seams will show under basement lighting.
- Prime repaired, stained, or porous areas: Primer helps even out absorption and keeps old marks from bleeding through.
- Choose a washable finish: Eggshell, satin, or semi-gloss usually holds up better than flat paint in below-grade spaces.
- Give the room air movement: Fans and dehumidification help paint cure properly, especially in cooler basements.
- Skip waterproofing by paint alone: If water is getting in, coatings will not solve the source.
One warning sign matters more than the color chart. If the basement still smells musty after the space has been emptied and cleaned, it is not ready for finish paint.
For style, keep expectations tied to the space. Bright whites can help with light reflection, but they also show every patch and surface flaw. Softer whites, light grays, and muted warm neutrals are usually more forgiving and feel less stark in a basement family room, office, or guest area. Clean coverage and durable prep beat trendy color choices almost every time.
- Epoxy Concrete Flooring
If the concrete slab is in decent shape, epoxy is one of the strongest low-maintenance options for a budget basement. It saves you from building up the floor with multiple layers, and it handles workshop, storage, utility, and recreation spaces better than many soft-surface finishes.
Many homeowners overlook it because they think of garages, not living space. That is a mistake. In the right basement, epoxy gives a clean, polished look and makes the whole room feel intentional instead of unfinished.
Start with an honest floor assessment
Do not put epoxy down on a floor you have not cleared and inspected. Old boxes, shelving, scrap wood, and random debris often hide the actual condition of the slab. Once the basement is emptied, you can see cracks, old adhesive, paint, or signs of moisture migration.
Westchester rental owners often choose epoxy in basements because it is easy to clean between tenants and hard to damage with normal use. It also works well in hobby areas, home workshops, and overflow storage where carpet would be the wrong material from day one.
Textured finishes are worth considering if the room is a pass-through or utility-heavy space. A glossy finish looks sharp, but a basement floor also has to be safe when shoes come in wet.
Where epoxy saves money and where it does not
Epoxy usually makes the most sense when the slab is already your finished floor. It is less attractive when the concrete is badly uneven or constantly damp. In those cases, the prep can outweigh the savings.
Before any coating goes down, solve drainage and moisture issues first. The problem with budget basement work is not usually the finish itself. It is paying for a finish on top of conditions that should have been corrected earlier.
Here is the floor style this approach can create.
A few practical checks before you commit:
- Clear the slab completely: You need the whole floor exposed for cleaning and repair.
- Remove dust and residue: Epoxy fails where the slab is dirty or oily.
- Confirm the basement is dry enough: Moisture problems telegraph through coatings.
- Respect cure time: Do not rush furniture or storage before the floor hardens.
Later, if you add rugs or furniture, the room can read more like a finished rec area than a utility basement. But epoxy only looks good when the prep work is serious. Skip that, and it becomes a peeling floor project instead of a budget win.
- Recessed LED Lighting Installation
Bad basement lighting makes every other upgrade look cheaper. Good lighting can make basic finishes feel finished.
Recessed LED lighting earns a place on almost every list of basement renovation ideas on a budget, even when the fixtures themselves are not the cheapest line item. A dark basement with new paint and flooring still feels unfinished. A well-lit basement with modest materials feels usable.
Light the room for how it will be used
Recessed LEDs work best when the room has more than one job. Consider a family room by night, office by day, storage along one wall, and a workout corner in the back. A low ceiling and exposed ductwork often make them a cleaner choice than hanging fixtures.
Space matters. Too few fixtures leave dead corners. Too many make the basement feel harsh and overbuilt. Dimmable LEDs usually give the most flexibility, especially if one section of the basement is for relaxing and another is for practical work.
Real estate agents staging lower levels often focus on lighting before decor because buyers judge a basement quickly. If the first impression is dark, they stop seeing possibilities. If the room is bright and even, they start imagining uses.
Call the right pro for the electrical work
This is not the place to fake it. A licensed electrician should check circuit capacity, fixture placement, and any wiring near insulation, joists, plumbing, or duct runs. If the ceiling is still packed with old shelving, dangling wires, or debris, have the space cleared first so the electrician can access the work area.
One practical detail many homeowners miss is color temperature. Warm light works better in TV rooms, guest space, and family areas. Cooler light works better over benches, laundry areas, and work zones. If the basement has multiple functions, use separate switches where possible.
Lighting should match the room’s job. A basement workshop and a movie room should not be lit the same way.
Property managers like LED upgrades because they cut the dated feel of an old basement quickly. Homeowners like them because the room feels bigger without knocking down a wall. Both are right. If the basement ceiling is already open during cleanup or partial demolition, that is usually the best time to add the wiring and fixture locations.
- Removable Wall Paneling and Finishing Systems
Drywall is not the only way to make a basement look finished. In some lower levels, it is not even the smartest way.
Removable or semi-permanent paneling systems can give you a cleaner look while keeping access to foundation walls or utility runs. That matters in basements where you still want to monitor moisture, reach shutoffs, or avoid trapping future problems behind a fully closed wall.
A practical option for tricky basements
This approach makes sense in rental properties, utility-heavy basements, and spaces that need a visual upgrade without the full commitment of traditional framing and drywall. Homeowners in older houses often benefit from this because they can improve the look of the room without pretending the basement behaves like an upstairs living room.
Rigid foam board systems, interlocking panels, and moisture-conscious wall coverings can all work when installed correctly. The exact product matters less than the logic behind it: Keep the wall cleaner, brighter, and easier to maintain while leaving room to inspect what is happening behind it.
That is especially useful in storage basements and multipurpose areas. If one wall houses mechanicals, meters, or future repair access, a removable panel system can save headaches later.
The trade-off is appearance versus access
Drywall gives the most conventional finished-room look. Panel systems usually give you more access and less risk of tearing apart a whole wall later. The right answer depends on what the basement is.
If the basement has a history of dampness, solve that first. You do not want any wall system hiding an active problem. Local code also matters, especially around insulation, vapor control, and fire safety. Check requirements before buying materials.
A smart hybrid layout often works best. Use more finished-looking wall assemblies in the main seating or office zone. Keep utility walls simpler and easier to open. That way you spend money where it shows and keep flexibility where the house needs it.
For homeowners trying to keep costs under control, this is one of the better compromises available. It can make a basement feel intentionally improved without forcing every wall into full drywall treatment.
- Strategic Demolition and Open Layout Conversion
The cheapest square footage in a basement is often the square footage you already have but cannot use well because bad walls, bulky built-ins, and leftover junk are stealing it.
A lot of budget basement projects go off track right here. Homeowners start pricing flooring, paint, and lighting before they clear the space, remove what no longer belongs, and figure out which walls are helping the room and which ones are just dividing up usable area.
That early demolition work sets the budget more than people expect. Taking out a non-structural partition, an oversized storage closet, a dated bar, or damaged paneling can make the basement feel bigger without adding a single square foot. It also exposes the conditions that matter, like moisture staining, old wiring, uneven slab areas, and surprise repairs hidden behind finished surfaces.
This is also the phase where junk removal stops being a side task and becomes part of the renovation plan. If old shelving, broken furniture, scrap wood, rusted exercise equipment, or abandoned yard tools are still sitting in the basement, they slow every step after demolition. Clearing that material out fast keeps labor focused on renovation instead of hauling debris pile to pile. If you are sorting through stored outdoor gear during cleanout, this guide on how to dispose of old lawn equipment helps you keep the process organized.
The trade-off is simple. Open layouts usually feel better and work better, but demolition has to be selective.
Some walls are just visual clutter. Others are hiding plumbing runs, carrying loads, or creating required separations around utilities. That is where experience matters. I always tell homeowners to treat the first round of demolition like investigation, not just destruction. Open what you need to inspect. Confirm what is structural. Leave mechanical access where the house needs it.
A smart budget approach often looks like this: remove the elements that make the basement feel chopped up, keep the pieces that protect access and function, and avoid rebuilding things you did not need in the first place. That can mean one large flexible room instead of three undersized ones. It can also mean keeping a utility corner unfinished while improving the main living zone.
If there is any doubt about load-bearing walls, electrical rerouting, plumbing relocation, or permit requirements, bring in a contractor or engineer before swinging the first sledge. DIY demolition saves money when the scope is clear. It gets expensive fast when it creates structural repairs, code problems, or extra finish work later.
Done well, strategic demolition is not just cleanup. It is the first cost-control move in the whole renovation. It gives you a cleaner layout, a more accurate budget, and a basement that is easier to finish without wasting money on the wrong square footage.
Add comment
Comments